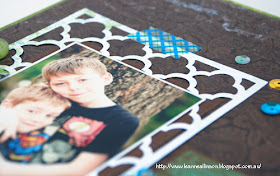
Family

Saturday, September 29, 2012

Design Team call...

Hello Everyone.  Emilia from The Papercraft Hub is having a design team call.  If you are interested, here are the details....


The Papercraft Hub (TPH) is looking for a few interested Design Team (DT) members to join our team!
Whether you are a card maker, scrapbooker or paper crafter, all are encouraged to apply.

Entering couldn’t be easier……simply leave a comment against >>> this <<< post by no later than midnight EST 23 November 2011 expressing your interest AND email thepapercrafthub@iinet.net.au with the following information :
  • your name
  • a short paragraph about yourself
  • your telephone number
  • your postal address
  • a link to your current/active blog (DT members must have a blog)
  • attach 3 projects you created recently that showcases your style
We will select and announce the 3 new members of our team on our blog shortly thereafter.
BENEFITS
  • Our lucky team members will be receiving products each release and be able to participate in the excitement that’s behind the scenes here at The Papercraft Hub! All products you receive are yours to keep!
  • You will also receive discounts off your purchases from TPH.
  • CONDITIONS
    Our DT Members will:
     
  • Post a minimum of 4 projects per month (1 per week) on TPH blog accompanied by a text describing your work, for our blog, publications and for use in advertising. (projects include but not limited to cards, layouts, altered projects, tutorials and/or videos).
  • Be able to post how to’s and tutorials on projects created for TPH. One (1) Tutorial/how to required per month.
  • Supply high quality photos of projects which include our watermark/label.
  • Provide physical examples of projects upon request for magazine publications, craft shows and other events.
  • DT members must have an active/current blog and promote TPH whenever possible on their blog. (this includes use of logos/blinkies, linking posts/products to our online store www.thepapercrafthub.com.au and blog, and posting in online forums where possible/allowed such as Pinterest)
  • Participate in new release activities, blog hops and challenges etc.
  • Support your fellow DT members by following their blogs and commenting on their creations made on behalf of TPH
  • Support customers by regularly commenting on their creations made for TPH Challenges and blog hops
  • Display TPH Design Team Badge and link to other Design Team members on your blog
  • Upload TPH creations to at least 2 online galleries (in addition to your blog) on a regular basis, preferably at least once or twice a month.

Please note that design team experience is not necessary.

We hope to talk to you soon!


Goodluck...x
 

Friday, September 28, 2012

I simply must not wake up!

That's the truth!  I must be dreaming.  Honestly!  I am floored with the amazing opportunities that have come my way in the last few weeks.  Just stunned.  And floored.  I can't put it any other way...

I have another announcement.  And I am super excited to share my news...


And what makes this adventure even better is the fact that my lovely friend Melinda joins me for the ride!

I am, in every way, so grateful for the chances to document and share my family stories through this passion.  Thank you Jill and the Jillibean Soup team for giving me this opportunity...x


Wednesday, September 26, 2012

Fancy That Dies...some cards

Hello Everyone!  I hope you are all having a wonderful creative day.  Today I want to share a little more Fancy That Dies goodness with some very simple three step cards.


Of course it also helps that I've used up some more of my off cuts!  *grin*  I love putting these extra bits of paper to good use.
 
 
I call these cards "three step" because well...,  there are three steps to creating them!  LOL! 
 
step 1.  choose and fold your off cut piece of cardstock. (being a 8.5in x 11in scrapper... I have a fair amount of 3.5in x 12in scraps in my stash!)
 
step 2.  add three sections/strips/blocks of co-ordinating scrap patterned paper.
 
step 3.  embellish with your dies.  I have used a selection from Fancy That Dies.  Check out the amazing range here!
 
 
You can't create cards any easier than this!  Trust me.  I've tried!  hee hee...


By the way, I love how these dies cut vellum.  It comes out perfectly.  And the little touch of vellum builds up the layers on my flower.  Got to love that!

 
products used: Fancy That Dies - butterfly quartet, sweet blooms, scalloped rolled rose, mixed leaves; cs - stampin' up, kaisercraft; pp - American Crafts Dear Lizzy, Jillibean Soup; other - Girls Paperie cardstock sticker, Greatest View sequins, vellum; tools - corner rounder.


products used: Fancy That Dies - photo corners 2, high in the sky, zippity do da; cs - kaisercraft, stampin' up; pp - American Crafts (Dear Lizzy & Amy Tangerine), Crate Paper, Kaisercraft; other - Girls Paperie cardstock sticker, twine, maya road clear stamps, close to my heart ink.
 
Notice on the middle strip of patterned paper (blue with white polkadot) I have used a die to create extra interest.  It is zippity do da and I love using this die in particular, to add to my layers.
 
Thanks so much for visiting today.  I hope you have fun creating a few cards out of your left over scraps of paper..x


Monday, September 24, 2012

She is important...

Hello Friends!  Sorry about the lack of blogging over the weekend.  We have just started two weeks of school holidays here.  The kids have been keeping me busy, organising play dates and other activities.  I need to do something to keep them entertained otherwise we each drive the others crazy!  *grin*  Today we are heading off to the netball courts for a bit of exercise and fun with friends.  :)

Today I am also sharing this layout created for Greatest View.  This was a joyful project for me to work on.  It shares the story of my "Masters" journey.  It was also a timely reminder for me to scrap more about myself.  :)  Yes.  I am very guilty of leaving "me" out of the equation when documenting our family stories..  I think I can honestly count on one hand, the number of layouts I have created, that are about me...  whoops!  Here is number... three or maybe four?

"She is Important"

products used: cs - kaisercraft; pp - Echo Park; Greatest View - zebra print bag, flamingo badges/flairs, pale pink bakers twineflamingo sequins; other - versacolor ink, mister huey's mist, studio calico stickers, typewriter.


I've added quite a bit of journaling.. not in the "zebra print bag" but in a file folder on the front of it.  In the bag itself, I've added all my bits and pieces that relate to this journey, including photos of my submission layouts..
 
 
If you would like to see a little more of the details, please visit Greatest View.  And while there don't forget to go into the shop and order yourself some of these beautiful badges/flairs! 
 
Thanks for visiting..x

Thursday, September 20, 2012

Fancy That Dies - "The Great Outdoors"...

Hello Everyone!  Today I am back to share a little "Fancy That Dies" goodness thanks to The Papercraft Hub! This week I have once again combined a layout about my older boys and... wait for it... flowers! LOL! (The things I do to my boys.. *grin*)...
 
 
"The Great Outdoors"
 
products used: Fancy That Dies - photo corners 2, frilled blossoms, swirly flourish, scalloped rolled rose, Moroccan wall paper, scalloped floret. cs - kaisercraft; pp - Bo Bunny; alpha - kaisercraft mini, jillibean soup; other - Greatest View: sequins & "family" definition badge, washi tape, Stampin' Up buttons.  photo credit: Brock Beazley Photography

I love creating interesting backgrounds, especially when it draws the focus to my photos.  The added texture/layer creates a fun element on my page.  This gorgeous Moroccan die reminds me of a garden trellis and playing outside.  Something my older boys love to do. 
 
The flowers I’ve added to this boyish layout have been cut from masculine colours.  Surely that counts for something! *grin*  The “frilled blossoms” look amazing teamed up with the “scalloped rolled rose” and the smaller “scalloped floret”.


And to add some depth to the paper garden I’ve created, I have tucked a "swirly flourish" beneath the flower petals.  Again the flourish emphasises the idea of a garden trellis with vines growing over it. 
To finish off my layout I’ve added a journaling pocket to hold the details and decorated it with a simple “photo corner”.
So there you have it.  Another boyish layout with flowers! hee hee.  Thanks for visiting..x
 
...........................................................................
 
ps - Thank you to everyone who left some blog or facebook love about my new exciting Bella BLVD adventure!!  I appreciate each and every comment...x


Tuesday, September 18, 2012

Bella BLVD!!!!!!

Squealllll!!!!!  Can you tell how excited I am to be a member of >>this<< fantastic Design Team??!! I have been happy dancing here in sunny Queensland, Australia for the last few days!  And adding the time difference for California, I'd say I've had a slightly longer wait! LOL!  no.. not really! 


Check out who else is on the team....


I really can't wait to be inspired by the gorgeous products from Bella BLVD and play along with this amazing group of talented scrapbookers.  sigh.... And if this is a dream... please DON'T wake me!  *grin*  I am already having so much fun!
 
Today I can share two of my four submission layouts...
 
 
"baby"
 
 
......and.....
 
"girlfriends"
(who knew vellum was making a come back huh?!  It certainly is on my recent layouts!)
 
 
Oh my!  I am still bouncing off the walls here! LOL!  A special congrats also to my fellow Aussies and friends Kim and Ebony!! September, 2012 has been an amazing month for me so far!  I can't wait to see what the next 12 months bring!! Woo Hooooooo!
 
 
Thanks for visiting..x


A little Greatest View sneak..

Hello friends.  I just wanted to share a little sneak of my latest Greatest View project.  *grin*

My lovely friend Gail is producing the most wonderful flair/badges and they are showing up on creations everywhere!  You need to visit the shop >>here<< to see her entire collection. :D  You certainly won't regret it.  *grin*

This is the sunburst/chevron combination I have used on my sneak...  You will see the full reveal next Monday.


Oh and you can pick up that "zebra" print bag from Greatest View too!  Thanks for visiting and happy shopping!  *wink!*

ps - who do you spy in the photo? lol! 
 

Saturday, September 15, 2012

Today...

Hi Everyone!!  It's time to share another layout for Stuck?! Sketches!!  These sketches are such a great way to get you motivated and I have created with that thought in mind.


The sketch allows you to add journaling.  How much, is up to you.  But for me, I find that I need to tell the story on my pages.  Something I find I am returning to do more and more of lately.  :) The photo on my layout doesn't really relate to the story directly, but I have used it to express my youngest son's independent streak.  *grin*


"Today"

products used: cs - Kaisercraft, Core'dinations; pp - American Crafts (Amy Tangerine), Echo Park (Dots & Stripes), Bella Blvd; alpha - Jillibean Soup; other - Greatest View sunburst flair/badge, toothpick, vellum, Amy Tangerine clear stamps, versacolor ink (charcoal), Mister Huey's mist, black pen (sharpie), typewriter.


There are lots of layers but my layout still manages to capture the essence of the sketch.  I hope you will join in and share your interpretation.

--------------------------------------------------------------
 
In other exciting scrappy news, I have been asked to join the Design Team over at The Scrapbook Store (formerly Handmade by Suzanne)!  I am so excited about this new adventure and I am looking forward to working with the fabulous team of ladies already in residence.. :)
 
Thanks for taking the time to visit....x


Thursday, September 13, 2012

Happy Scrappy news...

Hello Friends.  Today I just wanted to share some sneaks of this months issue of Scrapbooking Memories.  *grin*  In particular.. the cover!!! YAY!!

I was so excited when I saw this!  Well actually I went a little nuts!  hahaha!  And Cam was pretty excited too...


"Look Mum.  That's Camwron Twavis... and daddy too!"


And do see those beautiful flair badges and rolled calico flower?!  Guess where you can find them.  That's right.  :)  Greatest View


They are the perfect embellishment for Spring and Summer layouts.  Go on over to the shop and get yours now.  :)
 
Thanks for visiting and thanks to Scrapbooking Memories for choosing my layout..x
 
ps - Do you want to know a secret?  Hubby filled in an online "work-related" survey for the company newsletter yesterday.  One of the questions was about sharing something people probably wouldn't know about you... His answer - I'm on the cover of a magazine this month!!!  bwahaha! :)


Wednesday, September 12, 2012

Fancy That Dies ... "cold sand"

Hello Friends.  It's time for "Fancy That Wednesday", thanks to The Papercraft Hub.  :)  And I have a layout to share with you that incorporates a few of the gorgeous dies available from the shop...


"Cold Sand"
 
 
cs - kaisercraft; pp - October Afternoon, Bella Blvd, Pink Paislee, Kaisercraft, Crate Paper; alpha - Jillibean Soup; other - Jillibean Soup: corrugated butterfly & word stickers, Bella Blvd stickers, Crate Paper (SC) stickers, GV: badge/flair, twine & sequins, ink: versacolor, kaisercraft paint, typewriter.
 
The scalloped rolled rose from the new release has been layered with the base of several sweet blooms petals.  I love that the effect is so dramatic and has an icy demeanor, accentuated by being cut from the blue cardstock... after all, I was journaling about "cold sand".  a.k.a "snow"!! *grin*


The petals on the rose have been rolled tight and bent ever so slightly to create the fresh opening of a rose.  The ginko die also reminds me of frost spreading across the layers of paper.  I've left some of the leaves to reach upwards, free of adhesive, to add to the look and appeal.  :)


As for the strange title... LOL!  When Tahlia was 22 months old, we traveled to England to visit hubby's family.  It was in February and she (and myself) saw snow for the very first time!  The trouble was, for a beach-going, Summer - loving toddler, it was really hard to explain what snow was! lol! Tahlia however, came up with her own explanation of what it was.  Simply put... it was "cold sand"!

So last year, our very worldly 11yo, decided she could tell her brothers exactly what this business of snow was all about! *grin* I dare say she doesn't really remember her trip to England, but sometimes explanations stick and stay true!  hahaha!
 
Do you have any sayings that stay with you as you or your children grow?! I love jotting these things down and reusing them like this!  Thanks for visiting..x
 

Friday, September 7, 2012

Original...

Hi Everyone!  Are you ready for a sketch challenge?  Well check out this awesome over at Stuck?! Sketches. The September 1st challenge is now live...  Here is the sketch..
 
 
And here is my interpretation..
 

"Original"
 
products used: cs - bazzill, kaisercraft, Stampin' Up, Core'dinations; pp - American Crafts (Amy Tangerine); Greatest View - printed baggie, sequins, "original" feather badge/flair; other - American Crafts (Amy Tangerine) clear stamp, versacolor ink (charcoal & pinecone), jillibean soup round sprout, fiskars arrow punch, star punch (unknown), Mister Huey's mist, Girls' Paperie cardstock sticker, typewriter, machine stitching.

I think seeing the rather LARGE photo in the sketch immediately freaked me out! lol!! How often do you see that size photo on one of my layouts?! haha!  How about... ummm... never! *grin*


So I substituted the large photo in the sketch to include a photo and some journaling.  :) Not only have I got some journaling visible but that fabulous printed baggie (available from Greatest View) can hold extra memorabilia and notes.


Also from Greatest View are these fabulous feather badges/flairs.  And it is absolutely perfect for my title! lol!!
 
So I hope you will join in on the fun over at Stuck?!.  I can't wait to see your creations.  Thanks for visiting..x


Thursday, September 6, 2012

I spy...

Hello Friends.  Today I want to share a layout created with the new release Fancy That Dies available right now from The Papercraft Hub.  I tell you, these dies are so detailed and fun to work with, you are limited only to your imagination when it come to creating with them.  :)

Lately I've noticed an increasing trend to snap photos with your phone.  It is such an easy devise to use and let's face it.  I'm sure there are rarely any of us who leave the house without our phones these days.. *grin*.  And the apps you can get to edit and play with, are fabulous too!

My children are still too young (in my opinion) to have access to their own mobile devise.  However, it doesn't stop them from sneaking away with my i-phone any chance they get, to play games or like Cameron... take photos!  lol!  I just know when he's been near my phone...
 
 
"I spy"
 

products used: cs - kaisercraft; pp - American Crafts (Amy Tangerine); alpha - American Crafts (Amy Tangerine); Fancy That Dies: Dipsy Daisy, Doily Flower, Ginko Flourish; other - mister Huey's mist, Amy Tangerine clear stamps, versacolor ink (pinecone & charcoal), archival ink (midnight), kaisercraft ink (corn), vellum, Greatest View sequins, typewriter.

Check out the gorgeous Ginko Flourish from Fancy That Dies!  And that isn't even the full size!  I've trimmed a few leaves from off the underside and shortened it's length.  I wanted to use its graceful curves to lead the eye to my hidden journaling.


I've also added a Dispy Daisy cut from blue cardstock. It gives just the right amount of textural interest without it being overwhelming or distracting.


And finally I couldn't leave a layout without adding a Doily Flower tucked between some patterned papers! *grin* 


So.. Do you scrap using photos from your phone?  I have to admit this is a new thing for me to play with.  And I'm kicking myself for not doing it before now.  The next time you are sitting down holding your phone, take the opportunity to scroll through your photos and start forming ideas in your head on how you should document their stories.

Thanks for visiting..x
 

Wednesday, September 5, 2012

Did you know..

..that the latest issue of Etzcetera Magazine has been released.  And it is full of wonderful Spring ideas...


Kim says "Want to know what’s inside Issue 7? I’m glad you asked!
  • We catch up with Keisha Campbell and take a peek inside her beautiful home and studio.
  • Australian designer, Sonia Lyne is creating the cutest little things under her brand name Dandelyne..what until you see her cute creations!
  • Interested in worm farming? I wasn’t either until I read this great article by worm farmers Yvette Adams and Mardi Winen who are both passionate about their worm farms!
  • Have a chat with Tamar Bostock as she explores the world of bicycles in her latest Style Folio.
  • Lisa Pate introduces PART ONE of her brand new feature, Health Style – a health/fitness special feature where Lisa shares healthy tips, interviews, recipes and stories continuing over the next few issues of Etzcetera. In this issue Lisa chats with a married couple who have been on a weight loss journey together and have achieved amazing results as well as shares a healthy snack recipe, an exercise circuit prepared by a personal trainer that you can do at home and some tips on living a healthier life.
  • Do you own a mammoth stash of scrapbooking flowers? Tatum Woodroffe shares some fabulous flower busting projects to use up some of your flower stash.
  • Check out Lisa’s mood board for this issue – it’s a beauty!
  • Mel Nunn is here with some delicious picnic food recipes.
  • We have a special scrapbooking spring flower gallery to share.
  • Plus it’s SPRING time and we have some great flowery, Spring-y projects just for you."
..............................................

I've even created a Spring themed wreath for the front door...

 
... and of course there's a layout in the magazine too, sharing a few more of those gorgeous flowers from Manor House.  :)


Head on over to the blog and check it out.  Better still, become a member of the EtzClub!  Thanks for visiting..x


Tuesday, September 4, 2012

Sunburst...

Hello friends. And Hello Spring!!! *grin!  The weather in Queensland, Australia is just so beautiful..even though it is still a little bit chilly in the mornings.  lol!


Remember this sneak?  Well even if the sun isn't shining in your part of the world today, here's a little tutorial to make it appear onto a layout or card.  :)

Step 1.  Gather your supplies...


Punch out a large circle from yellow cardstock.  Punch out a second medium circle also from the same cardstock.  Repeat the the process with the medium punch on scratch paper: (1 large yellow circle, 1 medium yellow circle, 1 medium scratch paper circle).
 
Step 2.  Layer the medium scratch paper circle on top of the reverse side of the large yellow circle.


Once it has been centered, trace around the outside with a pencil.  Mark sections (approximately the width of your pencil) on this outer ring. 

Step 3.  Trim alternate notches with sharp scissors to form the base layer of your sunburst..


Step 4.  Using a small punch, punch out a piece from patterned paper.  Discard.  Using a round template (I've gone for the inner section of the washi tape!) trace around the outside of the negative punched shape on the patterned paper.  tip: Use the reverse side of the paper when tracing with pen or pencil.  :)


Trim around the pencil line to form a thin ring.

Step 5.  Assemble your sunburst. 


Step 6.  Add foam tape between the base layer and the medium punched circle for extra dimension.


And there you have it!  A simple homemade embellishment that uses up a few more scrap pieces of paper.  So.. what do you think?  Please leave a comment if you create a sunburst from this tutorial (or are planning to!).  I would really love to see how you create with them. :)
 
 
Thanks for visiting..x