Family

Thursday, July 30, 2015

Jillibean Soup | Scoot...

Hello Friends!  Today I am sharing a layout that involves both Jillibean Soup and Bella Blvd!!  How lucky am I to be on both design teams!  I still pinch myself. honest.
 
As a member of the Jillibean Soup DT, Bella Blvd challenged us to use the new clear cut confetti transparencies!  I love these!
 
 
Here's what I came up with..


products used: cs - American Crafts; pp - Jillibean Soup; Bella Blvd - Clear Cut Confetti Pickle Juice; Alpha - Jillibean Soup; other - Jillibean Soup: label stickers, sequins, file cards, enamel stars; tools - typewriter, stapler.

I decided to create a double banner with the clear cuts layered on top of the patterned paper. I also didn't want both layers to be the exact same size to add that extra level of dimension to the layout.
  
 
Each piece was stapled together before being adhered to the page.


This page was also a great way to use up any leftover bits and pieces that I had lying about from the Cool As A Cucumber Soup; a perfect collection for scrapping your boys!

Thanks for visiting.


Tuesday, July 28, 2015

Bella Blvd | Invisibles & Ears...

Hello Lovely Friends!  This poor little blog has been somewhat neglected again. But I am back today to share a layout created for Bella Blvd.  This blog post's title seems a little strange if not down right bizarre. I promise however, once I share, it will all start to make sense! LOL!
 
 
This week on the Bella blog, the creative team are focusing their creative minds on how to use the Invisibles Specialty papers. I love these transparencies; they are a little thicker than normal transparency paper and a lot sturdier than vellum sheets. Here's my project..
 
"Ears"
 
products used: cs - American Crafts; pp - Bella Blvd: Campout; Simply Spring; Bella Blvd Invisibles - Click! Click!, Blessings, Chit Chat, A Day At A Time; other - Bella Blvd: Treasures & Text, Enamel Dots, Crochet Hearts, Ciao Chip chipboard, Bella Bows; embroidery thread; Tools - typewriter, machine stitching, paper piercer.
 
Is the title starting to make sense now? *grin*
 
When putting this layout together, I knew I wanted to create a fun title! I wanted it to be large and I wanted the title to have layers - much like you would see on an illustration of a bunny rabbit.  With the Simply Spring collection and the fabulous Color Chaos Invisibles range I've created a fun look held together with hand stitching!
 
 
The first step was to select my patterned papers and cut large title letters with my silhouette. I followed the same procedure when cutting the letters from the transparent sheets of Invisibles. Before choosing which letter would be layered with which Invisible sheet, I made certain I could see both the patterned paper and Invisibles features. To finish off the title, I pre-pierced holes through both layers and hand stitched with coordinating thread.
 
 
To add to my layout, I've placed a white Bella Bow directly to the photo to make it look a bow tie. And I don't know if you can see in the photo or not, but this boy is pushing his very loose tooth over the top of his lip to get the "toothy" bunny rabbit effect!
 
 
Finally, I've played with the journaling to form a circle on white cardstock. Another subliminal message that I was documenting Easter, referring to not so round Easter Eggs!
 
 
Thanks for visiting today.  I hope you get the chance to visit the Bella blog this week for more fun inspiration using the Invisibles Specialty papers..x


Monday, July 27, 2015

Sassy Scrapper | Project Life Week 21...

Hey Friends! It's Project Life Monday and I have another spread up on the Sassy Scrapper blog today.


I hope you get the chance to come and visit..x


Monday, July 20, 2015

Sassy Scrappers | Project Life Week 20...

Hi everyone! Up on the Sassy blog today I am sharing Week 20.


I hope you get the chance to come and visit...x


Thursday, July 16, 2015

Jillibean Soup | Crazy Friend...

We all have one crazy friend, right?! LOL! Well my daughter seems to collect them.  In the sweetest possible way.  So I decided to create a page for this particular friend of hers as she loves scrapbooking and playing with paper as much as I do!!
 
Up on the Jillibean Soup blog today you will find this little RED number!
 
"Crazy Friend"
 
products used: pp - Jillibean Soup (Saffron Yellow Pepper Soup); alpha - Jillibean Soup (Beanboards, Alphabeans); other - Jillibean Soup: pea pod parts, wood sprinkles, flash cards, file folders, enamel stars, Party Playground red fringe.
 
Head on over to the Jillibean Soup blog for heaps more inspiration  and to check out the new Summer releases!  Thanks for visiting..x


Monday, July 13, 2015

Sassy Scrapper Project Life | Week 19...

Hello Friends! Up on the Sassy Scrapper blog today I am sharing my PL2015 | Week 19.


I hope you get the chance to come and visit...x


Sunday, July 12, 2015

Jot Magazine | July Mood Board...

Hello Friends!  Have you had a chance to check out the new July Mood Board over at Jot Magazine lately?  It is a stunner!  Created by the lovely Jot Girl Beshka, it has citrus-y tang to it that completely appeals to me!
 
 
smallJULY2015BESHKA BOARD
 
This is what I came up with...
 

products used: cs - Bazzill; pp - Studio Calico, Jillibean Soup; alpha - Bella Blvd; other - Bella Blvd stickers & chipboard; brads; tools - water colour paints, typewriter.
 
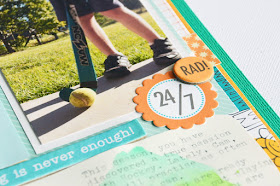
I was so inspired by the colours on this Mood Board that my story easily came together.  I also wanted to create a fresh look on my layout without the feminine touches. Therefore, colours + story + inspiration, culminated in a layout sharing my five year old’s passion for hockey and the crazy number of hours he spends practising.


 I'm so glad I've documented this story. The Heidi Swapp "document" die inspired me to capture this snapshot of life. After all, isn't this what it's all about?  *grin*


Head on over to the JOT blog and submit your entry to win a really cool prize!  I can't wait to see what you create. Thanks for visiting...x


Wednesday, July 1, 2015

Jillibean Soup | Art from the Heart...

Hello Friends! This was one of my favourite projects created for Jillibean Soup last month.  It is a simple display board where I can clip my youngest son's endless supply of hand drawn/painted/made artwork! *grin*
The process is simple.  If you know my style by now, you know I don't like to over complicate things! All you need to create this board for yourself is the burlap frame (found over at Jillibean Soup), a bulldog clip, Happy Hues paint and a soft brush. I am using Amiable Aqua paint from the Jillibean Soup Happy Hues collection. Don't forget to have a hot glue gun handy too!

Firstly I started by sourcing the top middle of my burlap pin board. Once I found the correct spot, I hot glued my bulldog clip into place.

Next I removed any stickers and poured the paint directly onto the frame.  Using the soft brush, I followed the grain of the frame to paint the top only.  Feel free to paint your frame entirely.  I liked having the inside and outside edges raw.

After the paint dries, add a wire word to the top of your frame and using Jillibean Soup beanboard alphas, create the phrase "Art from the Heart" along the bottom.


See.  Easy Peasy.  Now all you have to do is hang the frame and add some homemade artwork. Or it could even work for school certificates, notes or a place to jot down reminders!  I love how versatile this project can be!

Thanks for joining me here today.  Don't forget to head on over to the Jillibean Soup blog to check out some other fabulous projects..x

.....................................

art work by: Cameron Allinson.