Saturday, November 18, 2017

DCWV + Spotlight | Christmas Village & Gingerbread House...

Hey Everyone!! Check out this amazingly, cute paper village


How cool is it! It's a new Paper Project Kit from DCWV who've teamed up with Spotlight Australia.  It comes with six building, one being a pretty awesome looking church, plenty of mini trees and... a family of reindeer!! I'm so excited! LOL! 


They are actually so cute! All glittery with gold highlights. The buildings themselves have a frosted white glitter, which is unfortunately hard to see in these photos. The kit also provides a copper wire, battery operated lighting system.  This really sets your display apart from the norm, especially at night.

But I wanted to take this project one step further. Let's transform this house...


to this..


Each Christmastime, it's a family tradition to bake Gingerbread Houses... from scratch! Not an easy task. But this! So much easier and a lot less gooey! LOL

To start, create the chosen house as per the instructions in the kit. I would recommend painting the house a toasty gingerbread brown colour before assembling. This way you wont get paint on the gold trimmings!

I've also started to gather my supplies, such as white cardstock borders from simple scallop punches and Christmas Patterned Papers from DCWV.


If you haven't already painted your house, now is the time to do it, allowing it to dry. Add paint to the underside of the eaves as well.


Trim some candy canes from the DCWV Holiday Paper Lace Mat Stack. Mount it onto some white cardstock and carefully trim around the outside.


Add some candy canes to the front entrance of the gingerbread house with foam dots. Glue a scallop border to the front and back eaves of the roofline as well.


The rest of the gingerbread house has been decorated using the DCWV Holiday Jewel and Very Merry Mat Stacks.


Simple shapes have been used to create the snowman and trees on the side of the house and more scallop border punches have been added above the door. These borders have wrapped around the outside of the house to recreate the look of iced decorations.

Using a white gel Pen or paint, decorate the windows with lines and dots. Frame the window s with fussy cut branches - images found in the DCWV Very Merry Mat Stack.

Complete the look with gumdrops - flower punched shapes overlapped with each other. The DCWV Holiday Jewel Patterns Mat Stack provides plenty of beautiful colours to choose from.


Finally, light up you house using the supplied copper light system. This gingerbread house can be used as a stand alone feature or add it to your scene to create some fun and interest!

Thanks for visiting and please don't forget to check out the DCWV blog for more fun ideas..x

Sunday, October 29, 2017

Jillibean Soup | Stamping & Diecut Tutorial...

Hello Friends! I just wanted to share a tutorial posted on the Jillibean Soup blog recently. They've released a lot of fun new products including stamps and coordinating metal dies! 


Of course I couldn't resist playing with these goodies!! *grin*


products used: cs - American Crafts; pp - Jillibean Soup Farmhouse Stew; other: JBS Farmhouse Stew: pea pod parts, puffy stickers, clear stamps & dies; embroidery floss, ink; tools - typewriter.


Head on over and check out the full tutorial. Thanks so much for visiting..x

Wednesday, October 25, 2017

DCWV + Spotlight...

Hello Friends! A few months ago I was approached by American Crafts to see if I'd like to play along with Diecuts With A View and an introductory collection of products that will go into Spotlight Stores Australia. There was no way I was going to refuse their generous offer simply because I am a huge fan of DCWV! *grin*

What they sent me was Christmas in a box! And I am so excited!!!


Today I am sharing my first little project using the Gold Foil Very Merry Mat Stack, Holiday Jewel Patterns Mat Stack and Poinsettias Paper Project.


These stacks are so cute, I had a hard time deciding on which patterned papers to start with. So I thought I'd try to use as many as I could on a 4"x6" card.


After trimming some cardstock to size,  I selected a main patterned paper to feature as my background and trim on my card. The background patterned paper has been cut to 4"x2", while the small trim piece has been sized to 4"x0.75". The following step was to punch out multiple 1" circles from both the DCWV paper stacks.


Adhere the background patterned paper to the lower edge of the card base. Carefully align four (4)circles on top of the paper and glue/tape down.


**tip: Use a piece of washi tape, 1/2" wide, to help guide the placement of the next row of circles. Be mindful of the colour and patterns as you place them on your card.


Continue adding circles until you have six (6) rows. Add the trip to hide the edges and start to assemble your Poinsettia flower.


Stamp a simple sentiment just above the trim on the right hand side.


Add a few splashes of black paint, allow to dry...


.. and then attach the poinsettia flower to the from of the card.


On a side note, the Poinsettia flower above, has not been made to full size. I have only used three of the petal cut outs - two (2) small and one (1) medium. This size suits the card without overcrowding.


If you'd like to get your hands on these products and more, head to your nearest Spotlight Store Australia and check out what is available for the coming season!

Thanks for visiting today..x


Tuesday, October 3, 2017

Pebbles Inc | October Sketch...

Hey Friends! There's a new challenge up on the Pebbles Inc blog. We have started to introduce a few sketch challenges! Have a look at our very first inspiration sketch..


My layout has stayed pretty true to the overall positioning of elements on the page. However, I simply replaced the hexagon shapes with fussy cut butterflies from the new Midnight Haunting collection.
supplies: cs - American Crafts; pp - Pebbles Inc Midnight Haunting; other - Simple Life Embossed Stickers.


Head on over to the blog and seek out the inspiration shared from the amazing DT. Two winners will be chosen from the submissions sent in. Good luck!


Thursday, August 31, 2017

Pebbles Inc | Father's Day mini bag...

Hey There Friends! Father's Day is soon approaching and I thought I might share these super cute mini bags I created for the Pebbles Inc blog.

You can find all the steps you need to make both the shirt front and star tag bag here.


Thanks for visiting..x


Thursday, August 17, 2017

Bella Blvd | Keys...

Hello Friends! Today I have a bold and bright share using the Bella Blvd Addison collection. 

I created this layout with the idea of using all or most of my leftover scraps pieces that were sitting on my desk. The Addison collection is such a happy grouping of patterns and colours that I knew I wanted to use it in a celebratory way.


My daughter has recently passed her Learner's driving test which is quite a big deal for her! And I love that in this collection there was a die cut key!


I kept the photo black and white to allow the patterned paper to have a starring role. The strips of paper were also shaped to represent a city skyline with varying heights to create interest.


"Keys"
products used: cs - American Crafts; pp - Bella Blvd Addison; Alphas - Bella Blvd; embellishments - Bella Blvd: puffy stickers, paper pieces, stickers. other - staples, typewriter, paint.

The rest of the leftover paper strips have been layered with fussy cut images, stickers, puffy hearts or die cut paper pieces. My journaling was simply stapled to the bottom of the page and a few drops of paint complete the look of my layout. I am so glad to have now documented this milestone! Thanks so much for visiting..x


Monday, August 14, 2017

Bella Blvd | Project Life Filler Cards..

Hello Friends! Today I want to share some project life filler cards created using designer tape as my inspiration.

There's a brand new collection of Designer Tapes designed by the amazing people over at Bella Blvd. The patterns and colours are simple divine!!!


Card 1 | Designer Tape Feather

My first filler card has been styled using a washi/designer tape feather. Using a piece of florist wire, overlap the designer tape and then trim it until it resembles a feather shape. Notch a few triangles from the long edges to give it a fringe look. Adhere to the filler card using wet adhesive.


Card 2 | Punched Shapes

Using white leftover cardstock, punch your shape. I am using circles. Punch a second shape in a coordinating patterned paper to match the designer tape you wish to use. Add the designer tape to one half of the cardstock shape. Trim to match the shape of the punch. With the patterned paper shape, cut in half and adhere to the blank space of the cardstock. To complete the embellishment, add a chipboard icon to the middle of your punched out shape. Add the designer tape embellishment to your project life filler card.


Card 3 | Stamps + Designer Tape

Trim white cardstock to project life filler card size. Add designer tape to the lower edge of the cardstock and add stitching for extra effect. Using a stamp, add a simple sentiment above the designer tape lines. To complete the card, add a few enamel hearts to the top row of designer tape.


Each type of card can be create using a variant on the methods above. Try wrapping a chipboard pieces in designer tape or adding the tape vertically rather than horizontal.


Don't forget to check out all the new patterned designer tapes now available through Bella Blvd.


Thanks for visiting..x


Saturday, August 12, 2017

Bella Blvd | Secrets of the Sea mini album...

Hi Everyone! Today I want to share a project that I featured over on my Instagram for Bella Blvd. It's a mini album created using the Secrets of the Sea Boy collection. I love this 4x4 mini album size, as I can slip my Instagram photos straight in with minimal fuss!

I found my album's title quote on Pinterest and I think it suits this project perfectly!

"Bare Feet & Salty Hair"

products used: mini album - We R Memory Keepers 4x4 (black); pp - Bella Blvd (Secrets of the Sea Boy); alpha - Bella Blvd: Secrets of the Sea Boy Fundamentals; embellishments - Bella Blvd: Secrets of the Sea Boy Designer clips, paper pieces, puffy icon stickers; other - cardstock, machine stitching, typewriter.


Each 4x4 Instagram photo was mounted onto patterned paper and off set on the opposite page insert with a die cut paper piece, puffy sticker icon or a few notes  of journaling.


Some of my photos were posed but most of them are a capture of our family holiday in-the-moment snapshots.


The Bella Blvd Secret of the Sea boy collection was simply ideal for documenting our Summer holiday. I hope I have inspired you to also create a project using this collection the next time you pull out beach photos to scrap! Thanks so much for visiting..x

Thursday, August 10, 2017

Pebbles Inc | Heart of Home layout...

Hey there friends! I'm just trying to get this blog up and running once again! Life keeps interfering and it is a struggle to even get to the computer at times! LOL! But here I am, starting over. Again. :)

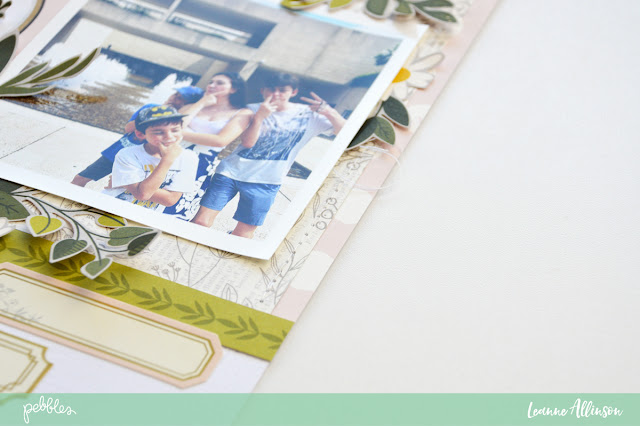
Today I have a share using the Pebbles Inc Heart of Home collection. I think I fell in love withthese patterned papers, almost instantly! *sigh*

My first project was to create a layout featuring my crazy kids!


products used: cs - American Crafts; pp - Pebbles Inc Heart of Home; embellishments - Pebbles Inc Heart of Home label stickers; enamel dots. other - machine stitching, typewriter.


The flowers were all fussy cut and adhered to allow the edges to lift from the page.


Machine stitching added an extra detail while the gold foil labels help to draw the eye across my layout.


You can see more details and read about my thought process to creating this layout on the Pebbles blog, here. Thank you for visiting..x