Showing posts with label cards. Show all posts

Friday, January 17, 2020

Bella Blvd | Back to School cards...

Back to school can be either exciting or nerve wracking! It can also be slightly chaotic! Why not try and remind our littlies or even the teacher, to enjoy and embrace the First Day of School with a cute card.


Check out my full post here on the Bella Blvd blog. Thanks for visiting..x


Wednesday, October 25, 2017

DCWV + Spotlight...

Hello Friends! A few months ago I was approached by American Crafts to see if I'd like to play along with Diecuts With A View and an introductory collection of products that will go into Spotlight Stores Australia. There was no way I was going to refuse their generous offer simply because I am a huge fan of DCWV! *grin*

What they sent me was Christmas in a box! And I am so excited!!!


Today I am sharing my first little project using the Gold Foil Very Merry Mat Stack, Holiday Jewel Patterns Mat Stack and Poinsettias Paper Project.


These stacks are so cute, I had a hard time deciding on which patterned papers to start with. So I thought I'd try to use as many as I could on a 4"x6" card.


After trimming some cardstock to size,  I selected a main patterned paper to feature as my background and trim on my card. The background patterned paper has been cut to 4"x2", while the small trim piece has been sized to 4"x0.75". The following step was to punch out multiple 1" circles from both the DCWV paper stacks.


Adhere the background patterned paper to the lower edge of the card base. Carefully align four (4)circles on top of the paper and glue/tape down.


**tip: Use a piece of washi tape, 1/2" wide, to help guide the placement of the next row of circles. Be mindful of the colour and patterns as you place them on your card.


Continue adding circles until you have six (6) rows. Add the trip to hide the edges and start to assemble your Poinsettia flower.


Stamp a simple sentiment just above the trim on the right hand side.


Add a few splashes of black paint, allow to dry...


.. and then attach the poinsettia flower to the from of the card.


On a side note, the Poinsettia flower above, has not been made to full size. I have only used three of the petal cut outs - two (2) small and one (1) medium. This size suits the card without overcrowding.


If you'd like to get your hands on these products and more, head to your nearest Spotlight Store Australia and check out what is available for the coming season!

Thanks for visiting today..x


Wednesday, August 9, 2017

Bella Blvd | Pinterest Inspiration...

Hello Friends! Today I am sharing a Pinterest Inspired creation combined with the gorgeous new Bella Blvd Secrets of the Sea collection!
I was looking through Pinterest and I came across this cute mermaid graphic..


I was inspired not only by the simple silhouette design but by the curve of the text as well.

Here's what I came up with.


products used: cs - American Crafts; pp -Bella Blvd Secrets of the Sea Girl 6x8 Mini Paper Pad; Alphas - Bella Blvd: Wonky Alpha Puffy Sticker, Tiny Text Alpha Stickers; Embellishments - Bella Blvd: Puffy Icon Stickers (Secrets of the Sea Girl), Designer Clips (Secrets of the Sea Girl); IF Enamel Hearts; other - sequins.


These cards will be perfect to share with my mermaid loving nieces on their next birthday! Thanks for visiting today..x


Friday, April 14, 2017

Bella BLVD | Easter Thank You...

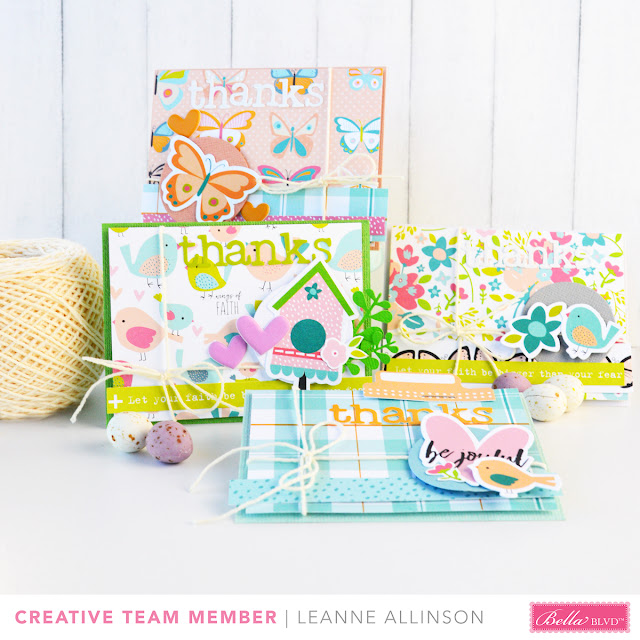
Hey Friends! I just wanted to share these 3x4 thank you cards I created last week. They're just in time for Easter! I want my friends to know how much I appreciate them. This was such a simple idea that I made them in less than an hour. 


I started with some base cardstock and grabbed the Illustrated Faith | Seed of Faith collection. I just adore the colours!

I was also drawn towards using the gorgeous Seeds of Faith paper pieces as well. Creating layers was easy by mounting them on foam dots!


Behind each cluster of paper pieces (die cuts) I added a simple 1.5" circle, punched from coordinating cardstock.


Add some twine and a few puffy heart stickers and these cards practically make themselves!! *grin*


Thanks for visiting today! I hope I've inspired you to pull out some supplies and play over the Easter weekend..x

......................................................

Supplies:

patterned paper - Illustrated Faith Seeds of Faith; cardstock - bazzill, American Crafts; embellishments - Bella Blvd Puffy Heart stickers, Illustrated Faith Seeds of Faith paper pieces; alphas - Bella Blvd Tiny Text Alphabets; other - twine, staple, foam dots.

Tuesday, January 10, 2017

Pebbles | Inspirational Cards ...

Hey Friends! Up on the PebblesInc blog today I am sharing a few simple ideas for creating motivational cards. Perfect for those New Year Resolutions!!!


Thanks for visiting..x


Saturday, November 26, 2016

Pebbles | Thankful Cards...

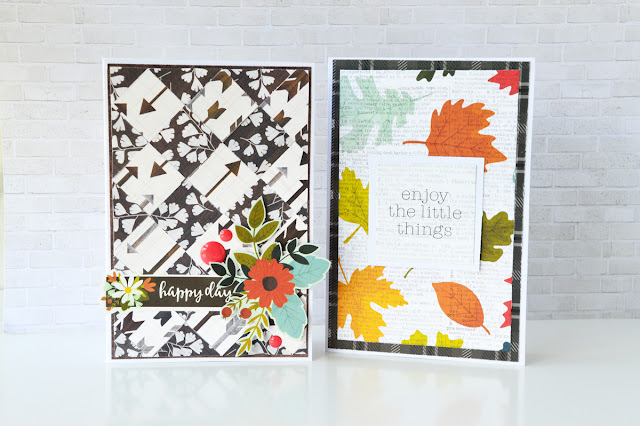
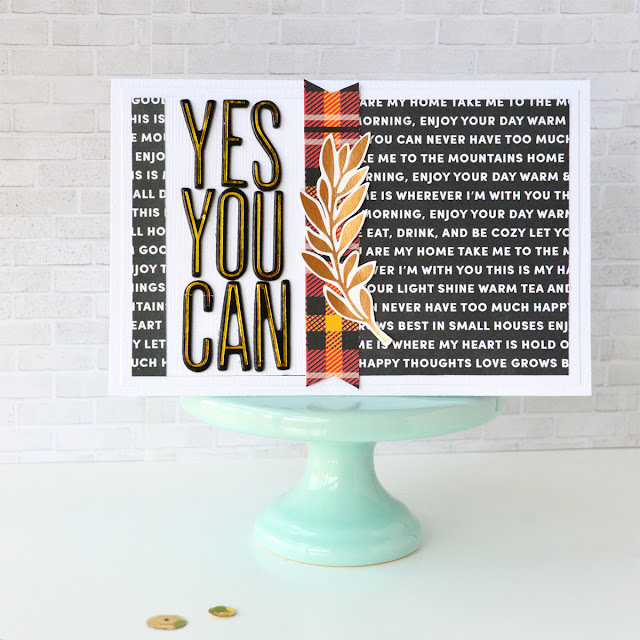
Hello Friends! Today I want to share with you a set of three cards created for the Pebbles Inc blog.


 Each one has its own unique look and all are very easy to make!


Head on over to the Pebbles blog and check out the Warm & Cozy collection (used here in the making of these cards) in more detail. Thanks for visiting..x


Wednesday, November 9, 2016

Jillibean Soup | LIVE...

Hello Lovely Friends! I've a quick layout and card share today for Jillibean Soup.

These two projects have been created using the new collections | Hardy Hodgepodge Soup & Chit Chat Chowder! I've also added a little dash of Healthy Hello Soup to mix it up!

"Life is Good" Card

"LIVE"

products used: cs - American Crafts; pp - Jillibean Soup; embellishments - Jillibean Soup: sequins, wooden sprinkles, pea pod parts; tools - sewing machine, typewriter, Jillibean Soup: paint, clear stamp & die.


Thanks for visiting..x


ps - Tap on the title to link up with each blog post.

Tuesday, October 4, 2016

JOT Magazine | October Mood Board...

Hey there! I'm back! LOL! I need to start getting back into the swing of blogging again, and well... so far... I'll keep my fingers crossed!! *wink*

Today I want to share with you all the gorgeous new mood board over at Jot Magazine.   This one has been created by the lovely Raquel and I've fallen for the soft pastel style hues...


Here is what I've been inspired to create..

"Thank You" Cards

products used: cs - American Crafts, Bazzill; pp - Jillibean Soup; other - Bella BLVD transparency, enamel doodads; Heidi Swapp Minc butterfly, rose pink foil; Crate Paper Butterfly embellishment, sticker phrases; tools - machine stitching, Heidi Swapp metal die, Jillibean Soup Happy Hues (paint).


These two cards will be popped into the mail later this week! Who doesn't love some happy mail!

I hope you get the chance to come on over to the Jot blog and join in the fun with the rest of us! Can't wait to see you there. Thanks for visiting..x


Saturday, October 1, 2016

World Card Making Day 2016 | Bella Blvd

Hello sweet friends! It has been a little while since I've had the time to come and visit here. Please forgive my absence while I make memories with my family! LOL!

Today is World Card Making Day! Yay! The team over at Bella Blvd have come together to help celebrate. I've had the pleasure of playing with the brand new Alex collection!


Here's what I created:

"14, Good Job, Bro!"

products used: cs - American Crafts; pp - Bella BLVD (Alex); alpha - Bella BLVD (Color Chaos); other - Bella BLVD: Alex paper pieces, washi tape, fundamentals; IF enamel hearts; twine; embroidery floss; tools - hand stitching.


Any mum of boys could probably tell you that they have an innate sense of gaming technology! I was drawn to using the paper piece of the xbox remote as my focal point. Boy + Game = fun birthday card!! My biggest boy turns 14 next month, so it was an easy choice to create this birthday card with him in mind. 


For added whimsy, I've included hand stitching and mounted the gamer remote control onto foam dots. I also love how the patterned paper shows through the washi tape at the bottom!

Thanks for joining me here on the Bella Blog Hop.  Don't forget to check in with BB every hour to see all the fabulous creations being shared. Plus there might also be the chance to win a prize or two... hint, hint!

Good luck!  And thanks for visiting...x


Monday, June 27, 2016

Sassy Scrapper | Simple Stories Let's Party collection..

Hello Friends! I just wanted to share a few Simple Stories | Let's Party projects created for Sassy Scrapper blog in the past month. It's bright and colourful and a whole lot of fun! I hope you enjoy! Just follow the links to go directly to the desired blog post.. ~ thanks for looking..x


Mini Album

I'm trying to be organised before my youngest son turns seven, so I can document all the fun stuff as we go along! I hope you get the chance to check it out here.

 "Mr Handsome"

This layout was one of the first projects created. I wanted specifically to create a non party themed page with all party designed goodies! I had a little help from Elle's Studio too though... You can find the blog post here.


Pocket Letter/Birthday Spread
Simple Stories 3x4 cards were made for exactly these types of projects!  LOL! Check out the details and tutorial for my son's 13th birthday on a blog post here.


Finally I managed to whip up some cute tags to add that little bit of something special to you gifting. You can find this really simple tutorial blog post here.

Once again, thanks for visiting..x


Thursday, November 5, 2015

Jot Magazine | November Mood Board...

Hello Everyone! Up on the new look Jot blog today, November's inspirational mood board has been released!  It has fresh and vibrant colours, chosen by the very lovely Kim Jeffress. Have a little look-see!


These colours are so beautiful together that I immediately pulled out anything that was either yellow or pink, from my stash, and just started layering..!
 
"Happiness"

products used: cs - American Crafts; pp - Bella Blvd, Scraptastic Club, Elle's Studio;  other - Bella Blvd stickers, enamel dots, Stampin' Up clear acetate 3x4 pocket page card; tools - foam tape.


It' s a bit had to tell with this photo, but I've used a clear acetate 3x4" pocket page card from Stampin' Up (it has the stars on it). I mounted the clear layer with foam tape and then added the butterfly (cut from my silhouette) on to it. The shadows enhance the illusion that the butterfly is floating above the actual card.


The Jot Girls really have created amazing projects this month! I hope you will come along and visit the blog for more inspiration and hopefully play along with us too! Thanks for visiting..x